
I held a wet plate collodion workshop at Serenbe Photography Center (SPC), Palmetto, GA last weekend. Here are some cellphone photos of the final day. Thanks to Dee Garrett Culpepper, Gerald Fryer, and interns Hannah and Tori for taking the workshop.
 First, thanks to SPC for hosting the workshop and giving us all a place to cool down during breaks from my portable darkroom trailer…
__________________________________________________________
 … and thanks to the Blue Eyed Daisy at Serenbe for serving us lunch, even though we were smelly, and covered in sweat and maybe a few chemical stains! Plus, they were very good to me each night after I cleaned up and returned for dinner!
__________________________________________________________
 Stephen Brownlee, our host, master printer, and lovely model (at least for day two) gets his pose on. We used my 11×14 collodion camera the entire weekend, starting out with 8×10 plates then moving to 11×14. The theory was, if students can make large wet plate collodion images in the field, they will have the skills necessary to make smaller plates in a more controlled indoor collodion darkroom setting!
__________________________________________________________
 Dee is eager to get started with lovely model Stephen! She looks happy, but she could be thinking, Todd, please put your cellphone away and help me move this camera! 🙂
__________________________________________________________
 Dee considers exposure times and talks through her plans. Collodion is a multi-step process and pre-planning is essential.
__________________________________________________________
 Dee pours collodion on an 8×10 plate in the darkroom trailer. Collodion can be poured in daylight conditions, but it was too breezy to do a good collodion pour outside. After the collodion is ready for sensitizing, the coated plate gets about a five-minute bath in a silver nitrate tank. Outside, our lovely model is sitting in the sun and waiting… and waiting…
__________________________________________________________

After exposing the plate in the camera and developing it back in the darkroom trailer, Dee emerges with a finished plate.
__________________________________________________________
 Gerald adjusting aperture settings. We used a relatively modern lens (1950s era) with an aperture adjustment ring for added flexibility between exposures… not that collodion always follows the rules of “normal” photography.
__________________________________________________________
![]() Gerald re-checking focus before exposing his plate. It’s always good to re-check everything, especially when working with a live subject. They will move and things will shift while you’re hard at work in the darkroom preparing and sensitizing the plate.
Gerald re-checking focus before exposing his plate. It’s always good to re-check everything, especially when working with a live subject. They will move and things will shift while you’re hard at work in the darkroom preparing and sensitizing the plate.
__________________________________________________________
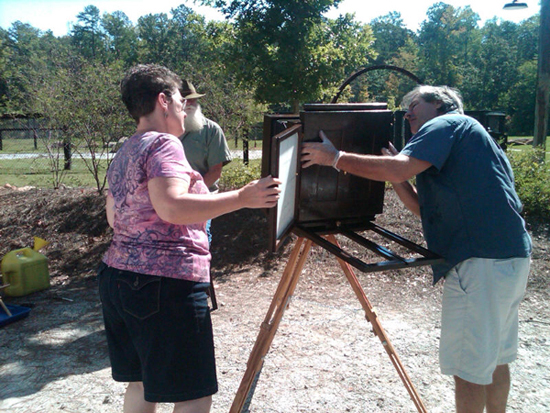
Gerald secures the plate holder to the camera back and prepares to expose his plate. It’s good to tag-team a camera of this size. It can be a pain to maneuver or control without extra hands.
Plus, the clock is ticking. The ether and grain alcohol in collodion is evaporating by the second. The plate must be developed before the collodion dries, or the image will be lost.
__________________________________________________________
 Gerald’s plate transforms into a positive in the tray of fixer. Notice the reflection of our model checking out the results, still in his hat! No doubt his mind is busy calculating increased modeling fees!
__________________________________________________________
 The racks are filled, one plate at a time!
__________________________________________________________
![]() We finish the day with 11×14 plates. Here, Gerald rinses his last plate of the workshop.
We finish the day with 11×14 plates. Here, Gerald rinses his last plate of the workshop.
We varnished the plates in the SPC darkroom. There is nothing like the smell of varnish baking onto plates over open flame. I wish I could invent a collodion varnish app so you could download it, and smell the heavenly aroma with one click of the mouse!
__________________________________________________________
![]() Large collodion plates done outdoors in the heat of the south. In my experience, that’s about as hard as collodion gets. And Dee and Gerald’s images are about as good as it gets from a collodion workshop, especially one held in the field! Excellent work guys!
Large collodion plates done outdoors in the heat of the south. In my experience, that’s about as hard as collodion gets. And Dee and Gerald’s images are about as good as it gets from a collodion workshop, especially one held in the field! Excellent work guys!
Gerald, this plate should be framed and on display!
__________________________________________________________
 It was worth the 12-hour drive from Maryland to Georgia!

Hello Todd, I enjoyed seeing the work from the workshop on your blog. Beautiful work! I will try to take your class next time. Let me know if you are planning to teach in the Charleston area.
Thanks Nancy! I would love to explore Charleston in collodion! It would be a wonderful place for a collodion workshop.